
Alright, well let's begin by noting how high waisted jean shorts are extremely popular in fashion today. Being so, I decided I wouldn't waist a lot of money on buying a new pair and instead I would make my own. By making this decision, I only ended up spending $4.99, which in my opinion is a steal, especially since I'm a poor college student. Woe is me.
Okay, moving past the chit-chat. You will need to take a trip to your local thrift shop (or in some cases, take a trip into your mom's closet and find some old jeans she doesn't use anymore). Once at the thrift store, look for a pair of high waisted jeans. When I went to buy my jeans, I visited a Goodwill and they were having a sale that week, all women's and men's jeans for $5. Try to find out if your local thrift store has sales similar to this one in order to get an even better deal.
Okay the materials that I used included:
- High waisted jeans
- Scissors
- Pencil
- Chip bag clip (or tongs if you have some)

So first comes the step that makes a lot of people (and when I say a lot of people, I'm emphasizing me) get nervous, cutting your jeans. The way I went about this process was I put my jeans on and kind of eye balled the length I wanted my shorts to be and marked that spot on my jeans with a pencil.

I then proceeded to take off my jeans and draw out and complete a line going across the front of the pants, using the marking I had just made. This line will then be the outline for when you go and actually cut your pants.
 |
| You may notice that I have flipped which side of the pants I am working on, pay no attention to this! Keep working on the same side you started on, we will move onto the second half of the jeans once we are done with the first. |
Okay, next you are going to cut along the line you have just made. HOWEVER, you need to make sure that you are only cutting through the FRONT part of your jeans, DO NOT cut the back yet. Also, make sure that you are not cutting through your pockets, this I'm sure would cause problems in your life.

Once the front half is cut it is time to move onto the back. This part was a bit more challenging to me as you need to make sure that you do not cut the back of your jeans at the same length as the front. This is because we are humans, and as humans we all have...varying curvature. In other words, you don't want the world to see your backside hanging out of your shorts (or maybe you do, and in that case cut the shorts however you want, free bird). Keeping this goal in mind, you really have to just make progressive cuts along the back of your shorts until you reach a comfortable length. Do this by putting the jeans back on and repeating the same process you did when cutting the front half of your pants. This means mark the jeans with a pencil and cut along the line your draw out for yourself. I apologize if this is confusing, but really, every body is different and there is no certain way to cut your jeans. The only beneficially thing about this tedious process is that you will end up with shorts that are cut perfectly for your unique body shape.
Adding onto the confusion and difficulty that this step entails, I realized that I did not take a picture of when I cut the back end of my jeans. Whoops. Just hope for the best honestly.
 |
| Here is the ending product of my pants, once I measured the back side of the pants to fit my body. |
Okay, moving on. Once you get your jeans to a length that you are comfortable with (a process that may take a few rounds of you putting your jeans on again and again to make sure they are suitable to you), you are now ready to cut the other half of your pants. Fold your jeans in half and use the cuts you have already made to outline the opposite side of your pants.


Use these marking to proceed in cutting the other half of your jeans. Make sure that you cut one side at a time.

This last step is relatively easy and self explanatory as you have a stencil available to you (the first half that you have already completed).
Once you have completed the cutting procedure of your shorts, you are now ready to make small touches to make the shorts look more relaxed and "fashionable".
I personally like jeans that look somewhat "worn" on the seams. In order to get this look I used a chip bag clip, however I believe tongs may work slightly better so if you have tongs I suggest you use that, if not, bag clip to the rescue.

You are now going to want to put the clip (or tongs) around the bottom edge of your shorts. Make sure it clasps onto the shorts. Now, pull the clip down and away from the shorts. By doing this you will loosen up the strings that are exposed from having been cut. You may have to put a bit of force into keeping the clip closed in order to get a tighter pull on the exposed strings of your shorts.
 |
| This is what the bottom of your shorts will look like if you choose to follow this technique. |
Continue this method all the way around your shorts. Once you are finished you will have shorts that look more relaxed or worn in. A look that is deemed fashionable today or whatever.

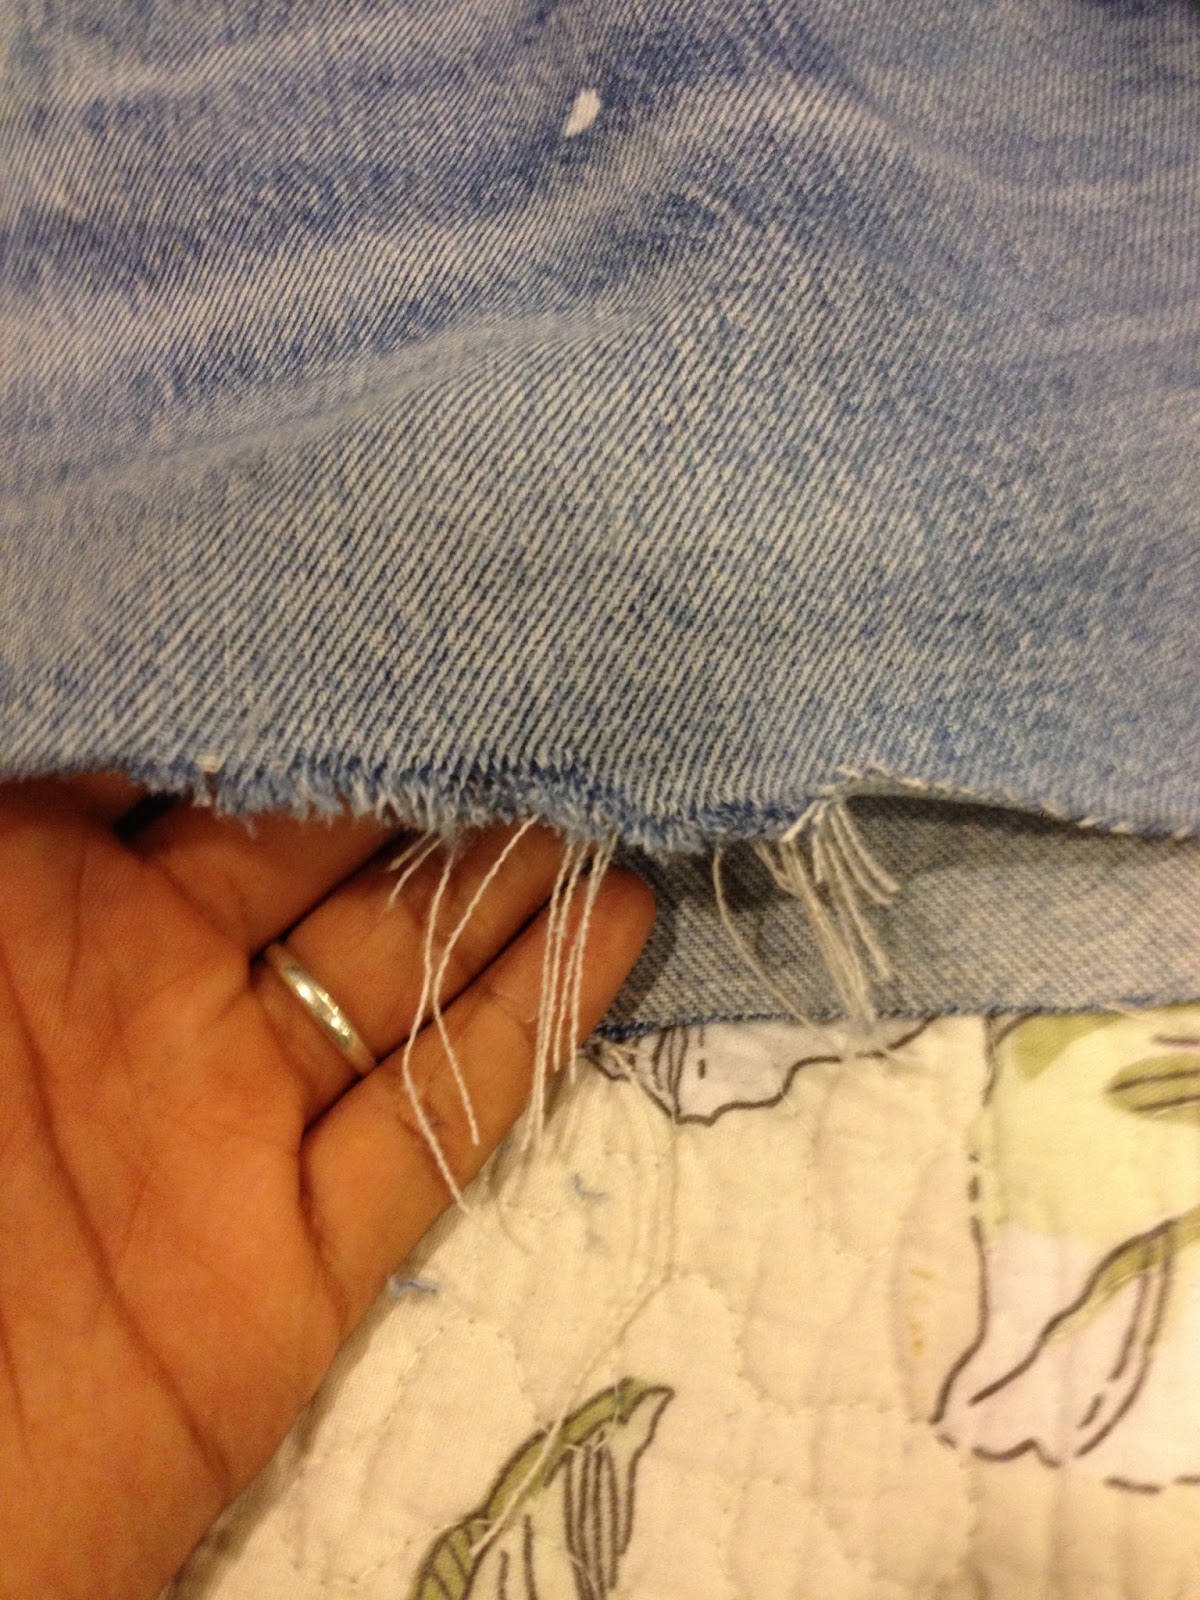
Tada! Wait! What is that? It seems that Dre has been careless in her process of loosening the edges of her shorts.
 |
| Careless. |
Yep. People, make sure that when you are using the clip to pull away from the shorts, that you have a firm grasp on the shorts, but not too tight or else you'll end up with a tear like this or worse.
However, if you are like me and are not very careful when doing the previous step, stay tuned for methods of fixing this small set back.
Who doesn't like torn shorts anyway? Time to make small tears in my new shorts. Do this by folding your jeans and cutting across those folds. MAKE SURE that you don't cut your pockets!


Once you make all the cuts that you want, repeat the process you did to tear up the bottom of your shorts on the small cuts you have just made. Make sure that you do this process slight more gentle however, as these cuts tend to be more fragile.

Once you complete this step, you now have high waisted shorts that have not costed you very much money or time to make! YAY!
 |
| Hooray! |
LOVE IT!!!
ReplyDelete